如何使用let's encrypt来实现免费的HTTPS证书

使用HTTPS是一个人最基本的素质,但是HTTPS需要SSL的证书。这个证书需要有受信任的证书机构颁发,不是随便搞一个就行了的。很多SSL证书居然要钱,丧心病狂。好在有Let's encrypt这种非营利性的证书颁发机构。
Let's encrypt是最好用的免费SSL证书机构,没有之一。
怎么玩?
首先我门要把我们网站部署号,域名什么都搞好我就不多说了。
然后我门登录https://letsencrypt.org/ 点击getting started,然后照着做就行了。
好吧我写详细点,假设你们用的是nginx和Ubuntu操作系统。
我们只要装一个Certbot软件,他可以全权帮我们搞定。
具体的
选择我用的是nginx和Ubuntu,按照你的实际情况选版本
下面会出现操作流程,首先装Cerbot的源:
sudo apt-get update
sudo apt-get install software-properties-common
sudo add-apt-repository universe
sudo add-apt-repository ppa:certbot/certbot
sudo apt-get update
安装cerbot
sudo certbot --nginx
运行cerbot
这里要注意,首先要把你网站在nginx里面没有ssl的配置好,域名什么的,一定要配置好。
域名解析要配好,能够通过域名访问到你网站 我一般喜欢仅仅获取证书,然后手动设置nginx,当然你可以直接运行:
sudo certbot --nginx我用的事:
sudo certbot certonly --nginx输出很重要:
IMPORTANT NOTES:

 -Congratulations! Your certificate and chain have been saved at:
/etc/letsencrypt/live/limfx.pro/fullchain.pem
Your key file has been saved at:
/etc/letsencrypt/live/limfx.pro/privkey.pem
Your cert will expire on 2020-06-01. To obtain a new or tweaked
version of this certificate in the future, simply run certbot
again. To non-interactively renew *all* of your certificates, run
"certbot renew"

 - Your account credentials have been saved in your Certbot
configuration directory at /etc/letsencrypt. You should make a
secure backup of this folder now. This configuration directory will
also contain certificates and private keys obtained by Certbot so
making regular backups of this folder is ideal.
我们首先把上面几个文件备份了
然后再修改nginx的配置
首先加入跳转,把http来的都跳转到https去:
server {
     listen 80 default_server;
     listen [::]:80 default_server;
     server_name limfx.xyz www.limfx.xyz limfx.pro www.limfx.pro;
     return 301 https://limfx.pro$request_uri;
     }
再加入ssl整数的配置:
 ssl_certificate /etc/letsencrypt/live/limfx.pro/fullchain.pem;
 ssl_certificate_key /etc/letsencrypt/live/limfx.pro/privkey.pem;

 ssl_protocols TLSv1 TLSv1.1 TLSv1.2;
 ssl_prefer_server_ciphers on;
 ssl_ciphers ECDH+AESGCM:ECDH+AES256:ECDH+AES128:DH+3DES:!ADH:!AECDH:!MD5;
然后重启nginx就可以了。
最后测试一下自动更新
certbot renew --dry-run
搞定了 enjoy
跟高级一点的玩法
上买你说的那个他是自动从nginx配置里面找到一个网站然后用那个网站的主机名申请的证书。
但是这里有个问题,例如我里面写的是limfx.pro那么他申请的证书就是这个域名专用的,cdn.limfx.pro这个就不能用。我们要申请一个支持通配符的证书才行。这个时候可以用手动申请证书的方式,这个方式我认为更加的简单,更加灵活我更推荐用这种方法。
只要一行:
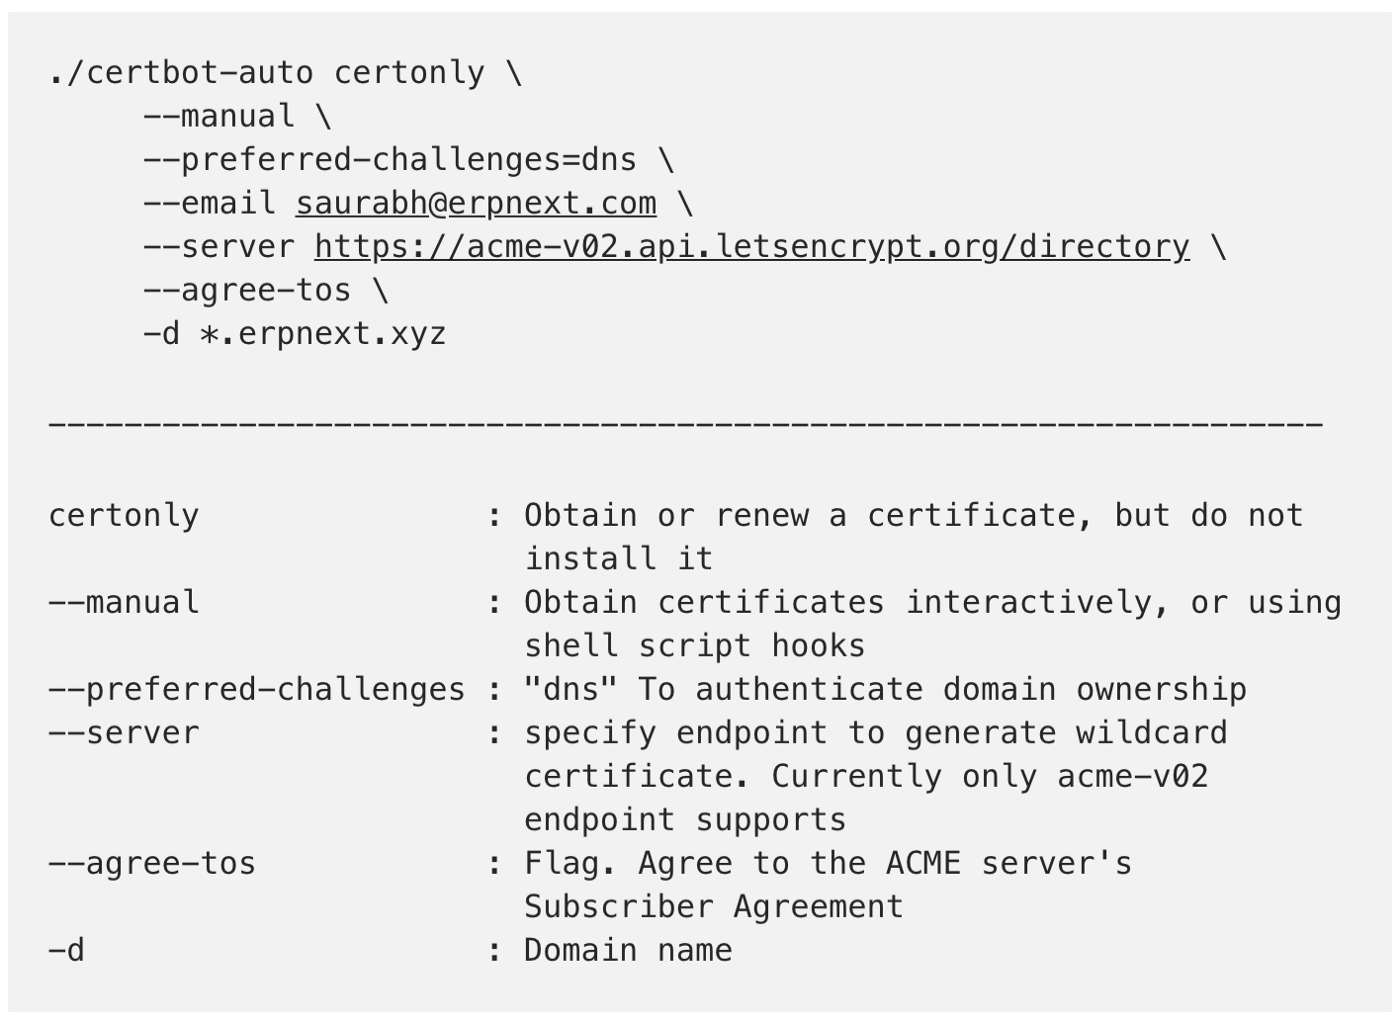
certbot certonly --manual --preferred-challenges dns --server https://acme-v02.api.letsencrypt.org/directory --manual-public-ip-logging-ok -d '*.<your.domain>'
这里面关键是的--manual,要手动模式,和--preferred-challenges dns要你设置dns txt recode来验证你对域名的所有权,然后-d '*.<your.domain>'是你的域名就行。
还有一些有用的选项,我就不解释了,可以看下面的图。
之后返回一个:
Please deploy a DNS TXT record under the name
_acme-challenge.yourdomain.xyz with the following value:
J50GNXkhGmKCfn-0LQJcknVGtPEAQ_U_WajcLXgqWqo
你把这个txt记录添加到你的域名解析里就可以了,等生效以后,一班要个几分钟到一个多小时,主要看你域名服务商DNS的反映了,你再输入yes确认一下,就完成了,他会给你证书,之后的就和前面的玩法一模一样了。
本文章使用limfx的vsocde插件快速发布